Should I Prep My Raised Garden Beds? The Importance of Preparing Before Planting:
Seeing winter is here, and most of us are unable to garden outdoors, most of us do the next best thing: plan our gardens for the next year. Do we want to plant the same tomatoes we did last year? What about adding some new rose bushes? Where should we put the new hostas we just bought? And, just like that, the garden planning begins… but, wait! Hold on a second! Before we decide what to plant (and where to plant it) A little preparation of the actual raised garden bed itself is necessary to assure that our plants flourish and succeed.
What do I mean by “preparation of the actual garden bed?” If we want a garden that will give us bountiful supplies of tomatoes and beautiful flowers, then we must make sure that the garden bed is ready to house them. The reasons why we should prep our garden beds before planting are endless. Some of those reasons include an increase in germination and plant growth rate, an increase in your soil’s aeration, the prevention of weeds, and much more!
There are many different tasks that people would label as “preparing” a garden bed. No two people do the exact same method. in today’s blog post, I will show you the steps that I took to prepare my garden beds last spring. Without further waiting, let’s get to it!
Adding an Inch + of Compost to the Entire Raised Garden Bed
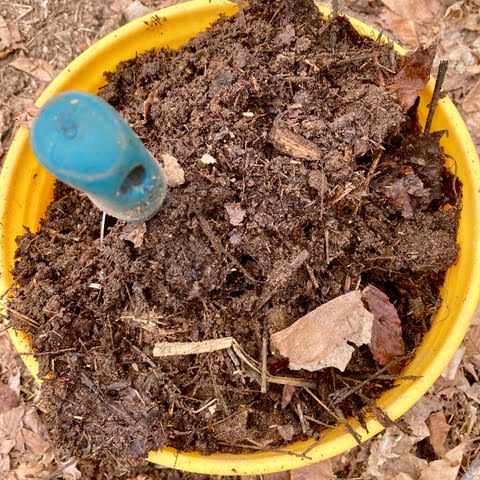
Adding an inch of compost to a spring garden bed seemed to be quite popular among many gardeners. To me, this made sense. After all, compost really is a more golden, nutrient-packed version of uncomposted soil. Right? Thankfully, my family and I have plenty of compost, and I was able to thoroughly cover my entire raised garden bed with lots to spare.
One of the first things I noticed after putting the layer of compost down was that the number of worms in my garden bed increased drastically. The soil, after about a month, looked so much richer than it had looked before. Although it would be a bit hard to gauge if it REALLY DID help my garden growing season add an inch of compost into the garden bed, I truly feel that it helped make my soil a lot less hard and nutrient-lacking. Which, in turn, made growing plants a much easier experience.
Solarization
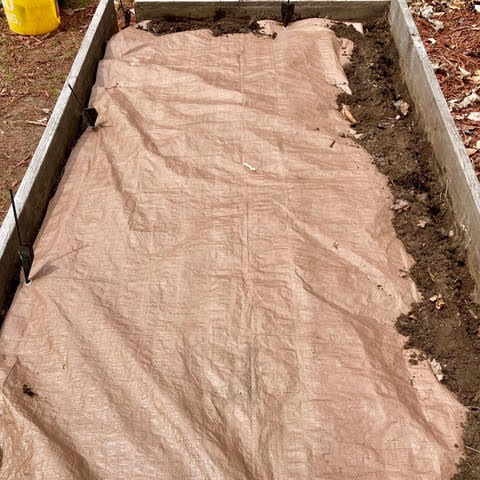
After the thick layer of compost was added, I decided to do a solarization treatment for three weeks. If you don’t know what solarization is, then don’t worry! I’ll give a short explanation of what it is and how to do it. If you guys would like to see a more in-depth guide on the process and benefits of solarizing your garden beds, then let me know in the comments below. And, I will create a more detailed blog post on it for you all.
In short, solarization is a method that involves covering the entire garden bed with dark, plastic sheeting or a heavy cover (such as a tarp). This helps warm the ground temperature of your garden before you plant any plants in it. Apart from warming the ground temperature, there are many additional benefits to solarization. For example, it can help prevent weed infestations, kill bad bacteria, and help plants grow faster.
Turning Over the Soil:
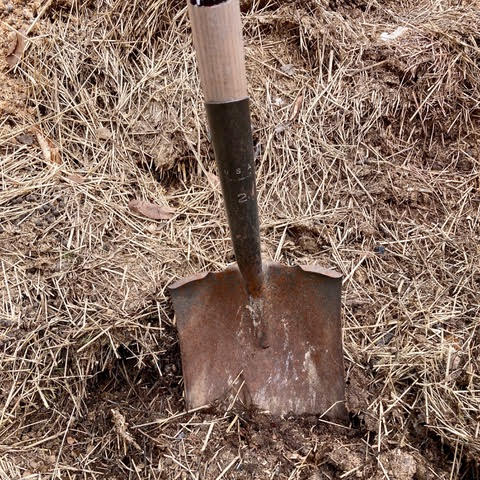
Approximately three weeks after having set up the solarization treatment on my garden bed, I removed the plastic tarp. The soil had become quite compacted, so I turned over the soil with a shovel to loosen it up. Then, I added another inch of compost, let it sit for a couple of days, and repeated turning over the soil again. I turned over my garden bed three times in total. And, it helped immensely in assuring my garden bed wasn’t hard and brittle.
The Results:
This was my first year having prepared a raised garden bed like this, and I think it will remain my method for the years to follow. I saw many benefits from adding the compost layers, solarizing the garden bed, and turning the soil. My garden had so many worms that I frequently would run into them while digging planting holes. Worms equal fertile soil, so I took this as a positive sign that my garden bed was not lacking nutrients. The other benefit I noticed was that the number of weeds I had was slim to none.
Having no weeds and not using any fertilizer or weed deterrent was very exciting to me. A side-by-side comparison of the weeds that I dealt with in my rose garden, to the weeds that I dealt with in my garden bed, was very telling that solarization is a useful treatment if you struggle to combat weeds. The last benefit I noticed was that my plants grew very rapidly… and they got huge! My radishes came out beautiful, and my marigolds were tall and lively. It made my heart happy every time I walked past my garden to see all of the luscious, green plants as a reward for my efforts.
Conclusion:
I hope that this blog post has helped in realizing the importance of preparing garden beds. It is common to want to dive right into actually caring for plants. But, trust me, garden bed prep will give us the beautiful, green plants that we envision all winter long. As Rudyard Kipling says in his “The Glory of the Garden,”- “Gardens are not made by singing ‘Oh, how beautiful,’ and sitting in the shade.” You simply cannot expect a good gardening year if you do not start off on strong feet. So, let’s go out there as soon as spring arrives (or, in my case, once enough snow has melted enough for me to even see my garden bed), and start our gardens off on strong feet by doing a little prep work!
0 Comments