
Seeing that the cold, wintery weather is here (or heading in that direction), many of us will be looking at doing some indoor home projects to spruce the place up a bit. We don’t always have the money to afford brand-new furniture and decor, but what about changing our current furniture and decor instead? While at my grandparents’ house one wintery day, my grandma assigned a project to me. She wanted me to change up the old wooden toy chest where my mom and aunt used to put their toys into something different. So, I began brainstorming ideas on what to do with it, and bam! I had a perfect idea! Why not make a DIY bench seat out of it for the foot of the bed? Today, I will be walking you through the entire process of how an old toy chest did a 180 in the design department and became the perfect bench seat for the foot of a bed.
The Supplies You’ll Need to Make a DIY Bench Seat:
- Any old toy chest/wooden toy box (if you don’t have one at your house currently, but still really want to attempt this project, I recommend checking your local thrift stores. Though I cannot guarantee that they’ll have one that looks exactly like mine or somebody else’s, they are sure to have some sort of chest that you can uplift)
- 100 grit sandpaper
- White Chalk Paint (I used the brand Rust-Oleum in the color Linen White)
- One large paintbrush and a smaller art-sized one if you have it handy
- Some wash clothes + one dry washcloth
- A nice, open area to work in (preferably with good ventilation and where you will not mind dust presiding)
The Basic Procedure:
- Sand the toy chest
- Wipe the sandpaper dust away
- Mix chalk paint with a SMALL amount of water
- Apply the first coat of chalk paint
- Apply the second coat of chalk paint
- Lightly sand to give it the distressed look
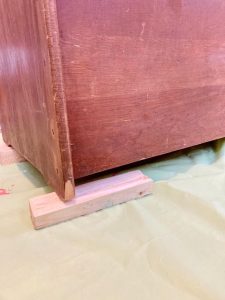
Step #1: Sanding The Toy Chest
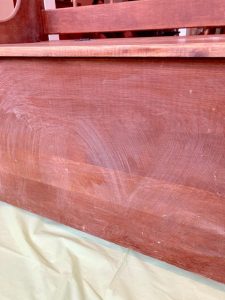
Before chalk painting the toy chest your desired color, I fully recommend sanding the entire wooden surface down to assure good paint adherence. This will save you both time in painting, and you will avoid ending up with a DIY project failure. How much stain your toy chest has (if it has any at all) is your determining factor for how much you will have to sand that puppy down! With my 100-grit sandpaper, I was able to sand my entire toy chest down in less than 15 minutes; however, the stain was quite old and worn. So, I did not have to use much elbow grease to get it off. Generally speaking, the darker the stain, and the newer the stain job, the more you will have to sand. Please note that you do not have to get ALL of the stain off, but you should definitely get enough off to make the chest have an abrasive feel when you run a hand over it.
Step #2: Wipe The Dust Away
Now that you’ve sanded the entire toy chest, it’s probably pretty dusty. It most likely has both attic dust and sandpaper debris in every crevice of it. You wouldn’t want this in your paint job because it would make it look gritty and dirty. Before cracking open your chalk paint, take a wet rag (I used a microfiber cloth) and wipe ALL of the dust off. If your rag is brown and dirty, it means you have succeeded at this step, and you may move on to the part we have been waiting for…. Painting!!
Step #3: Painting Time!!
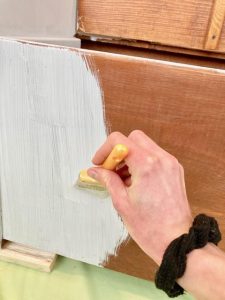
Alright! Time to let the fun begin! Open that can of chalk paint that has been waiting so patiently for you. If your chalk paint is rather thick (as most brands are) then I recommend putting some of your paint in a disposable tray and adding a SMALL amount of water. Keep adding water slowly until it is the consistency of icing (i.e., it runs off the paintbrush upon lifting, but drips in a slow, steady stream). You’ll know you’ve added too much water and not enough paint if it sloshes around in your tray. If you did add too much water, no big deal! Just add a little more paint to the tray and stir it around. After you’ve made your water/paint concoction, begin by applying a thin layer of the paint/water mixture over the entire toy chest. Make sure (if you’re using a brush) to keep your brush strokes going with the wood grain. All done? Now we let it dry…. Paint break!
Step #4: Apply the Second Layer of Paint
After waiting until the toy chest’s first coat of paint is dry to the touch, you can apply your second coat. Use the exact same method that you used with the first coat. At this point, you guys should have your routine down, so I don’t think explaining step four is necessary. Just keep painting!
Step #5: Turning it into a Rustic Farmhouse Bench seat
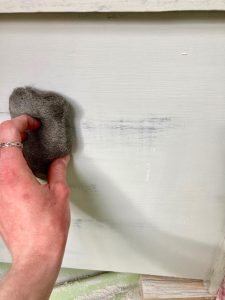
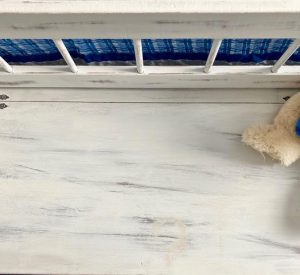
This step is totally optional If you’re going for a more refined, modern look. But, if you are going for more of a “rustic/farmhouse” vibe like I was, this is the step that will help you achieve that look! Take some medium to low grit sandpaper or rough steel wool, and begin to rub in one small area of the chest. Similar to when we paint, make sure to go with the wood grain. Once you’ve rubbed enough paint off to your liking, repeat the process somewhere else on the chest. My biggest piece of advice for this step would be to not overthink where (or how much) of the paint you are rubbing off. The look you’re going for is imperfect, so you REALLY don’t want the scuff marks to create an accidental pattern. It’s a matter of preference on how many times you repeat the rub-off-a-section process. Some people prefer more wood to show than paint, while others prefer more paint to show than wood. I went for somewhere in the middle, but that doesn’t mean you have to as well. You may take as little or as much paint off as your heart desires!
Step #6: The Finishing Touches
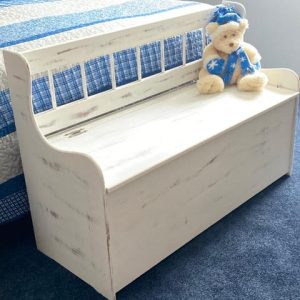
Now that you have finished your toy chest makeover, let’s add the finishing details to add practicality and style. Since I wanted mine to become a bench seat for the end of the bed, I measured and ordered a properly-fitted cushion to sit on top of the toy chest. I already had throw pillows available, so there was no need for me to buy more to match the cushion. However, if you would like to add throw pillows, I would order those too. This part is really what makes it personalized to your needs. Even if you didn’t turn your old toy chest into a bench seat, don’t forget to add the finishing touches that will make it more customized and personal.
After completing this project myself, I had the total satisfaction of giving something old a new life. Not only was the project satisfactory, but it was also quite simple and self-explanatory. Even if you deem yourself to not be the best at doing DIY projects, I have full confidence that you could at least Make a DIY bench seat like mine. It doesn’t get much simpler than sanding, painting, and ordering a cushion fit to your bench seat’s size. I hope this blog post helps you to turn your old toy chest into something that the entire family will benefit from. And, no matter what you turn it into, don’t forget to use your imagination. Think outside of that chest (haha, get it?), and fit it to your style!
0 Comments